How to Update the Firmware of GeoAstra X8-M1 to Version V1.2.16?
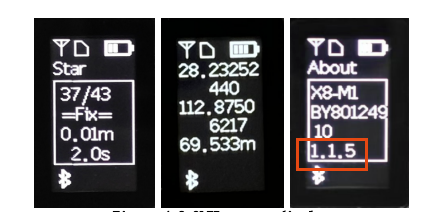
Quote from GeoAstra Official on May 14, 2025, 1:40 pmStarting from firmware version V1.2.16, the GeoAstra X8-M1 supports the RTK Base feature. To check whether your device is running this version or lower, refer to the device’s OLED screen:
Press and release the power button.
The OLED display will cycle through the Status, Coordinate, and About screens.
The firmware version will appear on the About screen (as shown in the screenshot below).
If your current firmware is lower than V1.2.16, you need to update it by following these steps:
Download the firmware update package from this link:
https://gpswebshop-download.s3.us-east-1.amazonaws.com/Bynav/Luatools_v3+2.zip
Unzip the downloaded file.
Locate the instruction manual titled “Update SW for X8-M1(M2) by USB.pdf”.
Follow the instructions in the PDF to complete the firmware update.
After the firmware update is complete, please check the following:
If your X8-M1 was originally running an earlier firmware version, the serial number may be cleared after updating to a newer firmware.
🔍 How to Check:
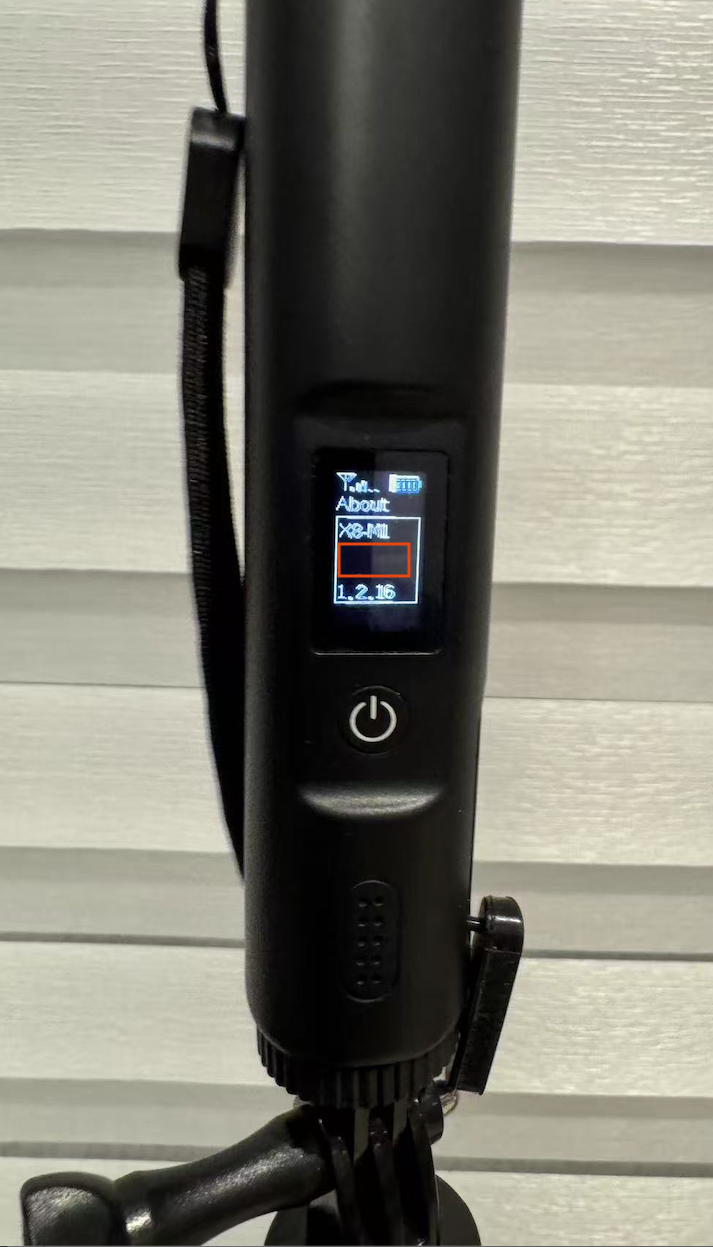
On the OLED screen, press and release the power button to cycle through the display screens.
On the About screen, check whether the serial number is shown correctly.
If the serial number is missing or incorrect, you may need to manually reset it using the steps below. If the serial number is correct, your X8-M1 firmware update is complete and the device is ready to use.
📝 Step-by-Step Instructions to Restore Serial Number
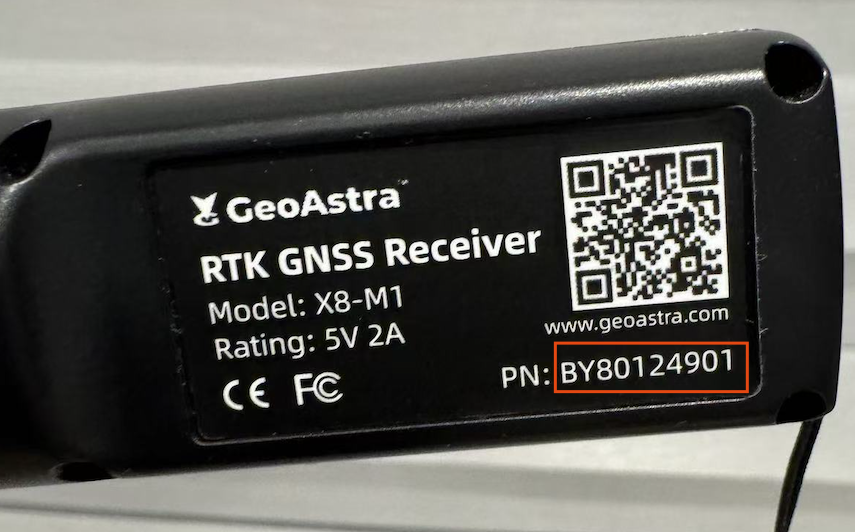
Find the Serial Number
Refer to the serial number printed on the product sticker (as shown below).
Example: BY80124901
Connect to a Windows PC
Use a USB cable to connect the X8-M1 to your computer.
⚠️ Do not use Bluetooth, as it may not support command transmission reliably.
Download and Open ByCenter Software (if you didn't do so.)
Download link: http://bynav.cn/en/resource/support?cat=6
Open ByCenter, and connect to one of the COM ports assigned to X8-M1.
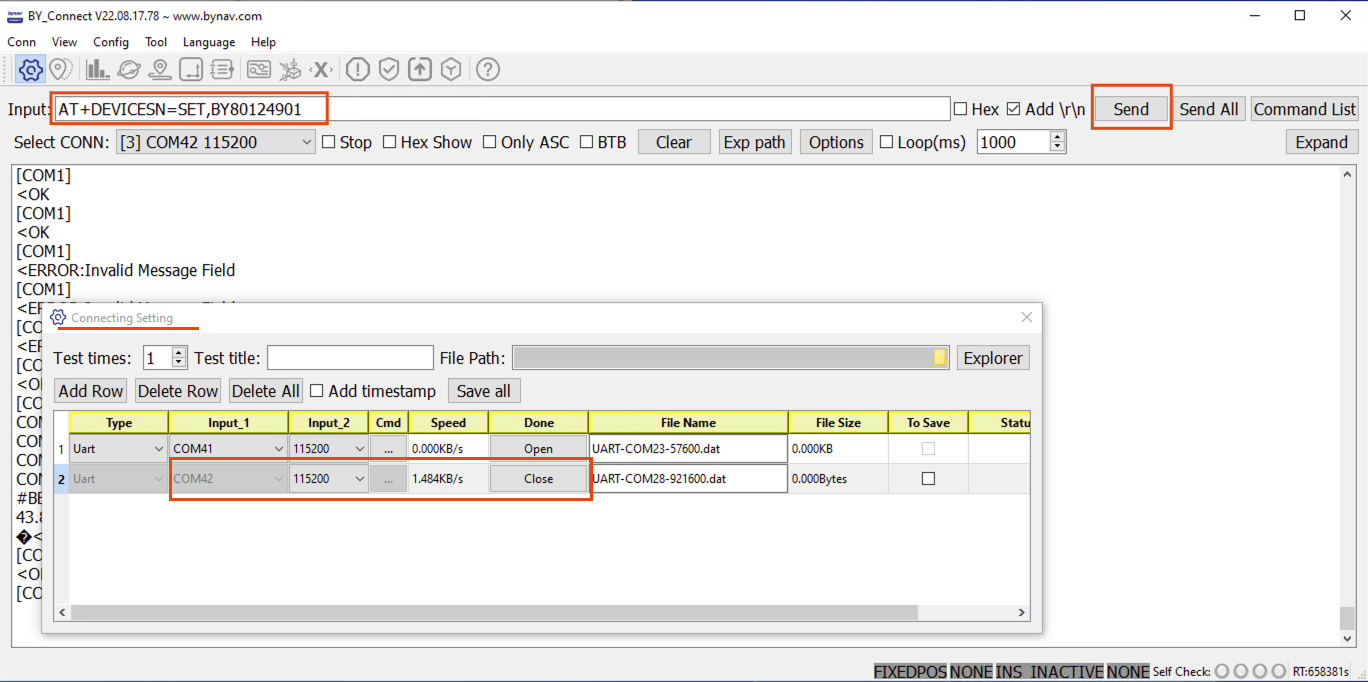
4. Send Commands to Set Serial Number
In the ByCenter command input window, run the following two commands one at a time, replacing SN with your actual serial number:
AT+MJ_IOT=CLEAR // Clears existing internal settings
AT+DEVICESN=SET,SN // Sets your device’s serial number✅ Example (for SN = BY80124901):
AT+MJ_IOT=CLEAR
AT+DEVICESN=SET,BY80124901✅ After Setting:
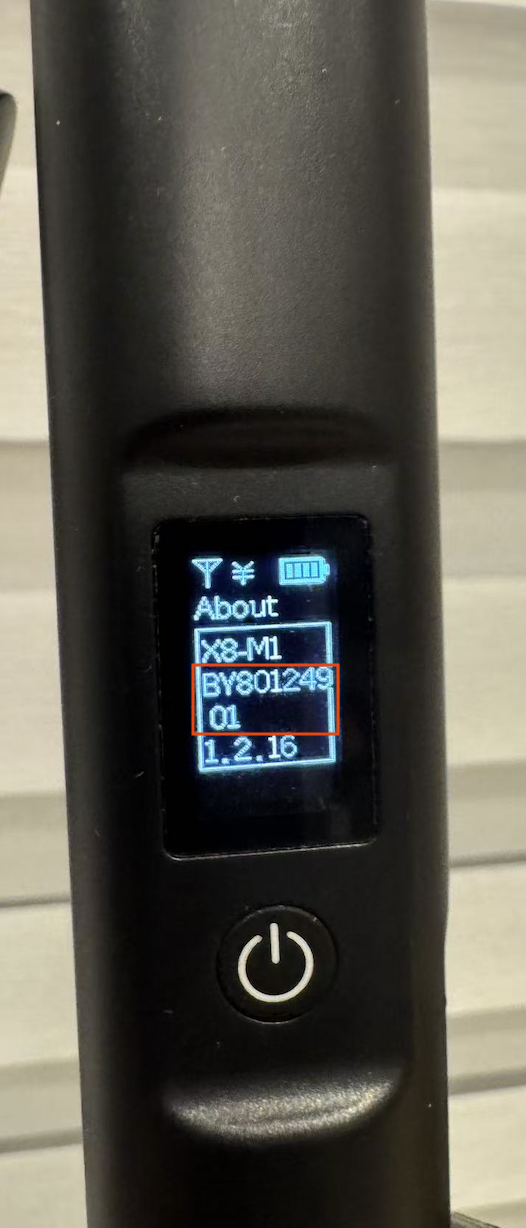
Once completed, go back to the OLED screen’s About page. You should now see the correct serial number displayed.
Starting from firmware version V1.2.16, the GeoAstra X8-M1 supports the RTK Base feature. To check whether your device is running this version or lower, refer to the device’s OLED screen:
-
Press and release the power button.
-
The OLED display will cycle through the Status, Coordinate, and About screens.
-
The firmware version will appear on the About screen (as shown in the screenshot below).
If your current firmware is lower than V1.2.16, you need to update it by following these steps:
-
Download the firmware update package from this link:
https://gpswebshop-download.s3.us-east-1.amazonaws.com/Bynav/Luatools_v3+2.zip
-
Unzip the downloaded file.
-
Locate the instruction manual titled “Update SW for X8-M1(M2) by USB.pdf”.
-
Follow the instructions in the PDF to complete the firmware update.
After the firmware update is complete, please check the following:
If your X8-M1 was originally running an earlier firmware version, the serial number may be cleared after updating to a newer firmware.
🔍 How to Check:
-
On the OLED screen, press and release the power button to cycle through the display screens.
-
On the About screen, check whether the serial number is shown correctly.
-
If the serial number is missing or incorrect, you may need to manually reset it using the steps below. If the serial number is correct, your X8-M1 firmware update is complete and the device is ready to use.
📝 Step-by-Step Instructions to Restore Serial Number
-
Find the Serial Number
Refer to the serial number printed on the product sticker (as shown below).
Example: BY80124901
-
Connect to a Windows PC
-
Use a USB cable to connect the X8-M1 to your computer.
⚠️ Do not use Bluetooth, as it may not support command transmission reliably.
-
-
Download and Open ByCenter Software (if you didn't do so.)
-
Download link: http://bynav.cn/en/resource/support?cat=6
-
Open ByCenter, and connect to one of the COM ports assigned to X8-M1.
-
4. Send Commands to Set Serial Number
In the ByCenter command input window, run the following two commands one at a time, replacing SN with your actual serial number:
AT+MJ_IOT=CLEAR // Clears existing internal settings
AT+DEVICESN=SET,SN // Sets your device’s serial number
✅ Example (for SN = BY80124901):
AT+MJ_IOT=CLEAR
AT+DEVICESN=SET,BY80124901
✅ After Setting:
Once completed, go back to the OLED screen’s About page. You should now see the correct serial number displayed.